In this step, you will learn how to...
- Add a Payment
For Further Help:
Note: Before you can look at outstanding invoices, you need to have completed the tutorial section Tutorial 9-1: Outstanding Invoices Report.When adding a payment, Pet Sitter Plus will try to automatically allocate the payment to any outstanding invoices. If an invoice hasn't been created yet, the payment will be held as cash on account.
Recording payments can be carried out from the outstanding invoices report, or you can add payments directly into the client's account as this method has more functions available to choose which invoice to allocate the payment to.
In this section you will learn how to record a payment on a client's account.
Navigation: Clients > Payments

Step 1: How do I Record a Payment?
Scenario: Tammy has received a cash payment from "Test Client Adams" to pay for their outstanding invoice for $210.00. Tammy now needs to record this payment so that the client's account balances.
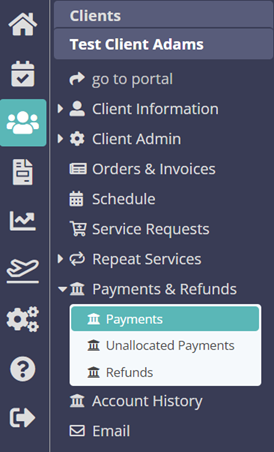
1. Navigate to the client account for "Test Client Adams" and click the "Payments & Refunds" option.
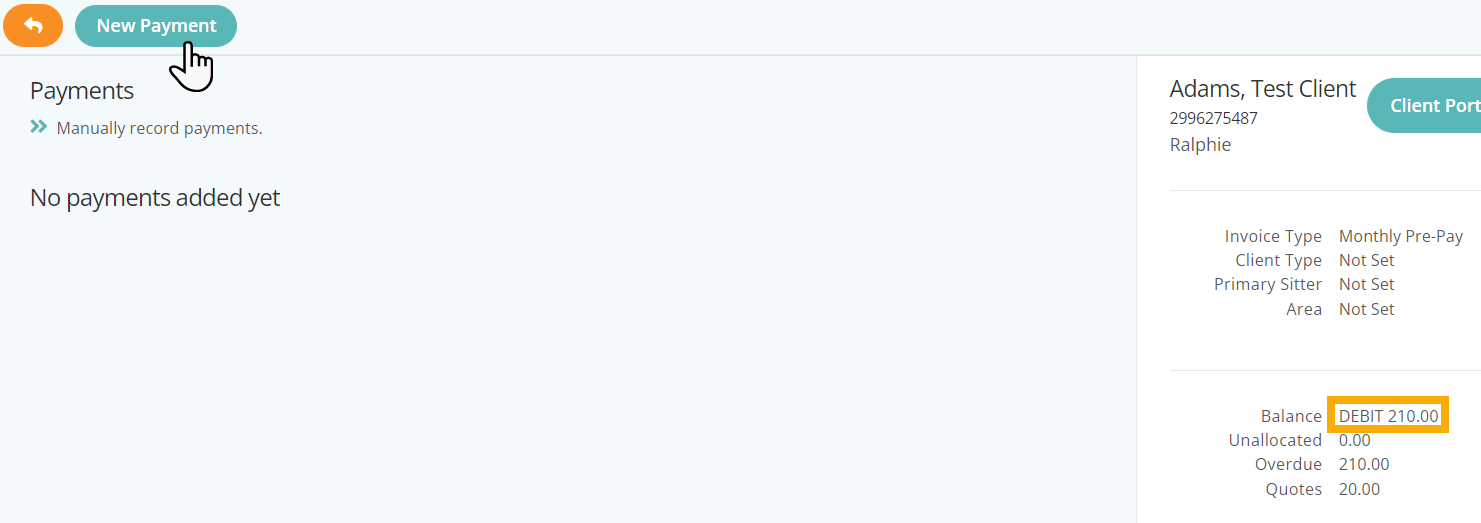
2. Note that the client's outstanding debt of "210.00" is displayed in the sidebar which contains a 'snapshot' of the client's account.
3. Click "New Payment"

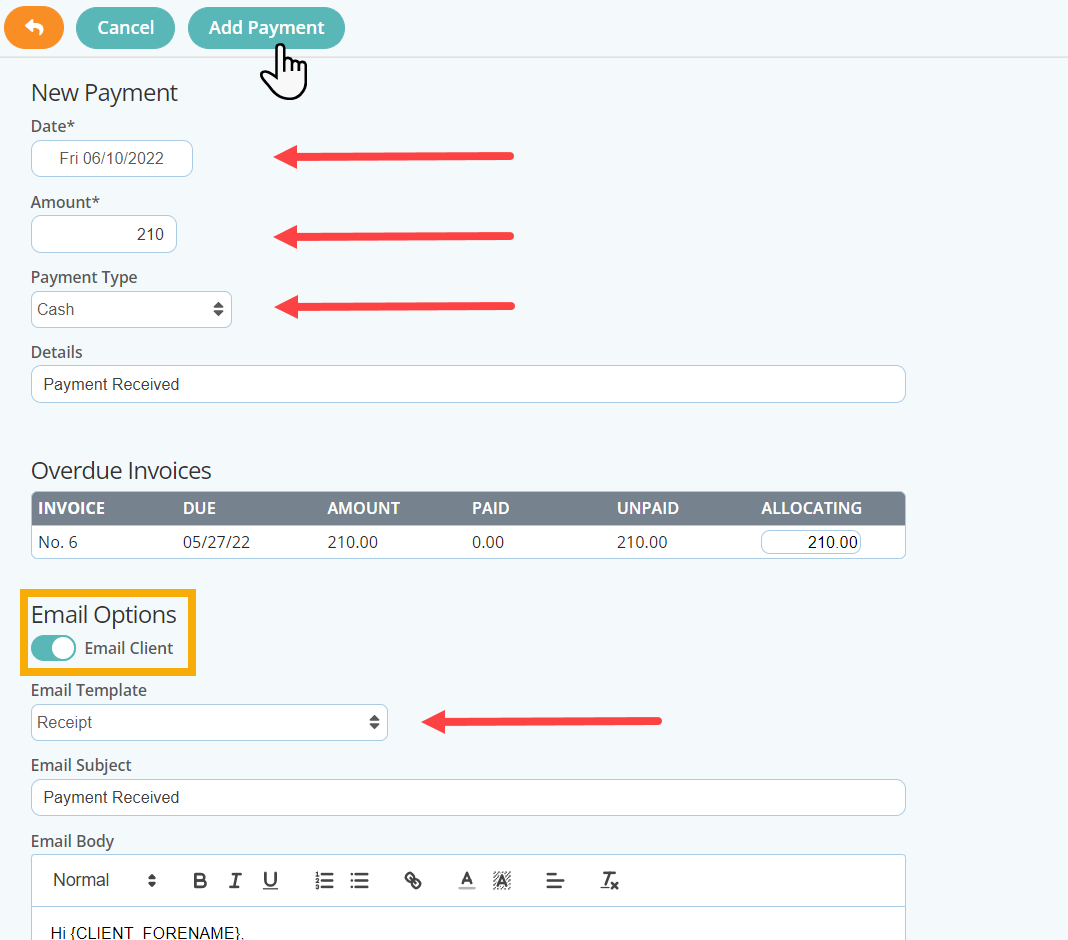
4. Enter the amount "210.00" in the "Amount" field.
5. Choose "Cash" from the dropdown for "Payment Type"
6. Toggle the switch to "ON" for the "Email Client" option. The "Receipt" email template is automatically pre-configured for you.
7. Click "Add Payment"

8. On the client's order the invoice is now marked as "Paid" and you can see the amount showing paid is "210.00"
9. The outstanding amount in the sidebar has now changed to a NIL amount.

This tutorial demonstrates a simple payments scenario within Pet Sitter Plus. To gain a greater understanding of the options available when you are ready to learn more, you can take a look at more complex issues for changing how amounts are allocated to invoices and working with unallocated payments in What is an Unallocated Payment?
Congratulations! You have completed this stage.
To move forward to the next step, click the link below and then choose the next step:
Was this article helpful?
That’s Great!
Thank you for your feedback
Sorry! We couldn't be helpful
Thank you for your feedback
Feedback sent
We appreciate your effort and will try to fix the article